
What's Inside?
Controls Beyond Timeclocks and Contactors
When designing the lighting for a space, there is always a debate concerning what lighting control system is best, and a large part of this involves cost. Owners want a simple, cost-effective solution that meets their needs and the building code requirements.
Traditionally, this was accomplished by timeclocks, contactors, switches and other standard lighting control equipment found at a local distributor or electrical supply house. Recently, the need for advanced lighting controls, including dimming, have complicated this issue.
Is it better to stay with the traditional timeclock, contactors and switches, or is it time to make the switch to a lighting control panel or even an architectural dimming panel? Some consider lighting control and dimming panels expensive, complicated, and not worth the trouble.
Dialectic will examine lighting control systems to compare their benefits, drawbacks, and approximate cost by looking at a typical installation and some common systems.
Additionally, we will provide an overview for those new to lighting controls, explore why controls have become more complicated, and examine common issues encountered with dimming different load types.
First, to enhance reader understanding, an explanation of the following terms:
- Line voltage wiring – a general term for wires that carry power from circuit breaker panelboards, typically between 120V and 480V.
- Low voltage wiring – a general term for wires that carry control and communications signals, typically less than 100V.
Want commercial insights? Check out our blog:
Why control requirements have increased
Lighting controls have become increasingly important and complicated. This can be attributed to evolving energy codes, an increased desire for “smart” buildings with intelligent control systems and changing lighting sources with demanding dimming needs.
A toggle switch at the door is no longer acceptable to building officials or occupants, who require a higher level of lighting control design. For the past 20 years, energy codes have been implemented across the United States.
In the beginning, energy codes were focused on restricting the amount of wattage installed. For the past 10 years, there have been increased requirements for manual and automatic lighting controls to further reduce energy use.
Below is a short summary of lighting control requirements commonly required by energy codes.
Manual Controls
Manual controls are initiated by the occupant. They give the ability to adjust lighting in the space with the assumption that occupants will turn off lighting they do not need or want and consume less energy.

Wiring for inboard/outboard switching Inboard/outboard switching is a common way of providing multilevel lighting control.
General lighting reduction
Depending on the space type and load, general lighting within a space is usually required to be multilevel. While older codes allowed 50-50 or bilevel switching, newer codes may require dimming under certain circumstances.
Space level control
Each space is required to have individual controls so the occupant can control the lighting. The controls have to be within the space or placed remotely with some way of indicating the on/off status of the lighting.
Automatic Controls
Automatic controls work without the occupant initiating them, with the assumption that there is some lighting usually left on. By providing automatic controls to turn off or dim unnecessary lighting, less energy will be consumed.
All energy codes allow or require the occupant to have the ability to override automatic controls for a limited amount of time.
 |
 |
|
Wall switch occupancy sensor
|
Digital timeclock
|
Automatic shut-off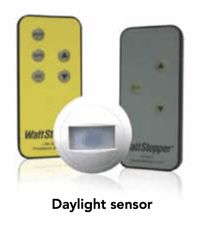
All lighting is required to be connected to automatic shut-off controls. This can be accomplished by a timeclock or occupancy/vacancy sensors.
Daylit zone automatic reduction
Depending on the space type and wattage, general lighting near a window or skylight may be required to automatically turn off or dim in response to available daylight.

Secondary Sidelit Daylit Zone Diagram 1
2016 Nonresidential Compliance Manual, Page 5-31
CALIFORNIA ENERGY COMMISSION © 2018 State of California
Dimming Considerations
Different dimming standards are required depending on the fixture type. All dimmers have specific considerations which must be followed for them to perform properly, and there can still be compatibility issues which must be addressed in the field.
Below are the three most common dimming types and their design considerations.
Dimming Types
Incandescent
Basics
- Incandescent dimmers are also referred to as triac or leading-edge dimmers
- Incandescent dimming is the most common type of dimmer at hardware stores and in homes
- They are line voltage dimmers which adjust the voltage (120V or 277V) to the fixture and are designed to handle the dimming curve for incandescent fixtures
- They can be used for some LED fixtures
Benefits
- High capacity: Up to 1920W
- Inexpensive and easy to find
Drawbacks
- Can produce a large amount of heat
- Require multigang boxes for large loads
- If minimum load is not met, fixtures will flicker, not dim or dim erratically

Wiring for typical line voltage wall dimmer Line voltage dimmers include incandescent, MLV (magnetic low voltage) and ELV (electronic low voltage) dimmers. They are wired the same way, but the resistive dimming device is different for each.
0-10Volt (0-10V)
Basics
- 0-10V dimmers are also called analog dimmers
- 0-10V dimming is a fluorescent dimming standard adopted by many LED lighting and power supply manufacturers
- The dimming is done at the power supply by taking two additional low voltage wires from the power supply to a device in the dimmer that modulates the voltage between 0-10V by functions known as “syncing” and “sourcing”
- At 10 volts the fixtures are at full brightness, at 0 volts the fixtures are at lowest brightness, while the line voltage power to the fixtures does not change
- To turn the fixture off, line voltage power is disconnected by a contact within the dimmer
Benefits
- Common dimming method for LED and fluorescent fixtures with power supplies
- There are many relay panels that have 0-10V dimming incorporated
- No minimum load issues
- Heat is not produced at the dimmer
- Minimal compatibility issues between fixtures and dimmers
- Most commercial grade LED fixtures come standard with 0-10V dimming capabilities
Drawbacks
- Requires additional wiring between the dimmer and the power supply
- A limited number of power supplies can be on the dimmer, typically not more than 20

Wiring for typical 0-10V wall dimmer
© 2018 Acuity Brands Lighting, Inc. All rights reserved.
Electric Low Voltage (ELV) and Magnetic Low Voltage (MLV)
Basics
- ELV dimming is also referred to as reverse phase or trailing edge dimming
- MLV dimming is also referred to as forward phase and is a modified version of a leading-edge dimmer
- ELV and MLV dimming were developed for halogen lamps powered by low voltage transformers
- A toroidal or magnetic transformer is dimmed with an MLV dimmer, and an electronic transformer is dimmed with an ELV dimmer
- Both modulate the line voltage power to the fixture and are designed to limit the amount of electrical interference created
- Both are used to control some LED lighting, but ELV is more common
Benefits
- Additional wires are not required between the fixture and the dimmer
- Most manufacturers provide a list of ELV or MLV wall dimmers compatible with their fixtures
Drawbacks
- Most wall dimmers have a maximum load of 300W or 600W
- If minimum load is not met, fixtures will flicker, not dim or dim erratically
- Compatibility of ELV or MLV fixtures with dimming panels is not always guaranteed
 |
 |
|
Track head with electronic Magnetic low voltage power supply |
Magnetic low voltage power supply |
Dimming System Comparisons
We will use an example space with common control requirements, and compare the differences in equipment, installed costs, setup, use, benefits and drawbacks between four common dimming systems.
A retail sales floor has been chosen, but many of the issues encountered would also occur for restaurants or offices. The back of house spaces will not be addressed to simplify the comparison.
The lighting in the space has both ELV and 0-10V dimming requirements. Automatic controls are required to shut off all lighting at the end of the day and dim the daylight zone near the window.
Manual controls are required to:
- Reduce general lighting
- Separately control general, decorative and display lighting
- Override the timeclock and photocell
Dimming systems Use Cases Menu
| Timeclock and Contactors | Smart Breaker Panel | Relay Panel w. 0-10V Dimming | Architectural Dimming Panel |
We will compare four systems: timeclock and contactors, a smart breaker panel, a relay panel with 0-10V dimming, and an architectural dimming panel. All systems will provide the same control functions.
Light fixture schedule

For each system we have developed a bill of material, switchbank elevation, riser diagram and one-line control diagram. Because we have not included the equipment that is the same for each installation, the calculated cost can only compare costs differences between the systems, not the total costs of each system.
Use case 1 – Timeclocks and contactors
Riser diagram

Setup
Setup is performed by the electrical contractor and is limited to setting the timeclock on and off schedule. This could also be done by the occupant.
Use
Occupants adjust light levels as needed with the local switches. They can override the timeclock for up to two hours with the override switches and adjust the lighting fixtures in the daylight zone with the remote.
Switchbank elevation

Cost estimate

Benefits
- The system is familiar and easy to use
- It is difficult for users to permanently damage the system
- Reduced risk of compatibility issues for ELV dimming
Drawbacks
- Cost associated with individual installation and wiring of all components
- Changes in system operation must be rewired by an electrician
- The system doesn’t automatically reset to its original settings after being adjusted
- Requires a large switchbank
- It is not possible to set scenes that can be manually or automatically initiated
One-line diagram

Use case 2 – Smart breaker panel
Riser diagram

Setup
We have assumed that this system can be set up by the electrical contractor and added additional labor to the cost estimate to account for this. Setup requires setting the on or off status of the breakers based on triggers from the associated low voltage switches.
Use
Occupants can turn lights on and off using the low voltage switches. These can also be programmed to override the timeclock, so separate timeclock override switches are not required. Dimming requires separate dimmers, and the daylight zone is adjusted using the remote.
Switchbank elevation

Cost estimate

Benefits
- Separate panelboard and lighting control panel are not required
- Fewer separate parts to install
- Reduced risk of compatibility issues for ELV dimming
- Switched scenes can be created
- Switching scenarios and scenes can be changed after installation through programming
Drawbacks
- Separate dimmer switches are still required
- High cost for limited additional control
- A specific panelboard is required
- Unswitched emergency lighting circuits can pose issues
- Installation cost of the system and its components is approximately $13,800, or 25% higher than timeclocks and contractors
One-line diagram

Use case 3 – Relay panel with 0-10V dimming
Riser diagram

Setup
We have assumed that this system can be set up by the electrical contractor and added additional labor to the cost estimate to account for this. Setup requires setting the on or off status of all lighting, the dim level of dimmed 0-10V lighting, and the dimming response of the photocell.
Use
Occupants turn lights on and off, adjust the dimming level of 0-10V fixtures, override the timeclock and adjust the daylight zone using the low voltage control switches. Dimming the ELV fixtures requires use of local dimmer switches.
Switchbank elevation

Cost estimate

Benefits
- Reduced installation and material cost
- Fewer separate parts to install
- Reduced switchbank size
- Reduced risk of compatibility issues for ELV dimming
- Override for switching, dimming, photocell and timeclock is by low voltage switches
- Switching and 0-10V dimming scenes can be programmed into the system
- Most settings can be modified through programming
- Installation cost of the system is approximately $9,600, or 13% less than timeclocks and contractors
- There are savings in both materials and installation costs
Drawbacks
- ELV dimming still requires separate dimming switches
- System may be difficult to modify by the user
One-line diagram

Use case 4 – Architectural dimming panel
Riser diagram

Setup
We have assumed that setup will require a site visit by a factory representative and added additional labor to the cost estimate to account for this. Setup requires setting the on or off status of all lighting, the dim level of dimmed 0-10V and ELV lighting, and the dimming response of the photocell.
Use
Occupants control all functions of the lighting control system through the low voltage switches.
Switchbank elevation
Cost estimate

Benefits
- All switching, dimming and timeclock controls are centralized into one system
- Fewer separate parts to install
- Reduced switch bank size
- All control is by low voltage switches – individual line voltage dimming switches are not required
- Complete switching and dimming scenes can be preprogrammed into the system
- All settings can be modified through programming
Drawbacks
- High material and setup cost
- System may be difficult to modify by the user
- Any compatibility issues with ELV dimming modules can be difficult to correct
- Installation cost of the system is approximately $14,000, or 25% more than timeclocks and contractors
One-line diagram

Conclusion
Each system has its own benefits and drawbacks and, depending on the needs of the client, any one could be considered the correct choice. Below are some reasons why an owner may choose each system.
Timeclocks and contactors
They require an inexpensive system, though owners may not realize that the least expensive option may be a basic relay panel or some other system depending on their needs. Scenes are not needed at different times of the day or for special occasions.
If owners do require a special scene, it is acceptable to create that scene manually and then adjust back regular settings manually when done. Owners do not have the facilities management staff available to modify the programming of a more complicated system.
Smart breaker panel
Space in the electrical room is at a premium and eliminating as much additional wall mounted equipment as possible is required. Lighting control is limited to switching scenes of large groups of fixtures, for instance, if a client has a large space that needs to switch lighting in three groups such as millwork, downlights, and signage.
Smart breaker panels are popular with many big box retailers, and commercial and industrial facilities. While this solution was more expensive in our example, in the correct application it can provide a cost savings.
If the owners are building a new facility and will already be purchasing new panelboards, there could be a cost savings.
Relay panel with 0-10V dimming
Dimming is required, and most of it is 0-10V. If this system is used, it is beneficial to select fixtures that have 0-10V dimming over other dimming types during the lighting design. Switching scenes are required at different times of day and for special occasions.
If a lighting scene is created manually for a special occasion, lighting must return to the regularly scheduled scene the next scheduled occurrence. Owners have the facilities staff available to modify the relay panel as needed.
Many relay panel manufacturers do offer remote programming. If the relay panel is connected to the internet or provided with a telephone line connection, trained staff are available to dial into the system and make any changes desired with clients while they are on the phone.
Architectural dimming panel
Multiple types of dimming are required and they must all be controlled by an integrated system in order to set scenes. Specific scenes are required and these must be determined and programmed at the time of commissioning.
For example, high-end retailers with windows facing busy streets may require specific scenes for store open, daytime, stocking, night, and special events. The clients are comfortable using an architectural dimming panel and facilities staff are available to modify it or know how to contact with the manufacturer if changes are required.
Other systems
Other lighting control systems are available in addition to those listed. For example, distributed controls have gained popularity and offer many advantages for some projects.
Need help with your Lighting Control solutions?
Dialectic’s team of design engineers are always happy to help answer your questions. Contact us today.